Click photo to enlarge
Hi everyone, This is a Halloween Layout I made and welded in DesignStudio. If you have the cartridge I used you can download my cut file and make one. I hope you all like it! I will add the pitures later on.
Cartridge I used:
Plantin Schoolbook for (letters) welded and cut at 1 1/2 inch.
Stretch your Imagination for (spider and pumkin) cut one spider 2 1/2 inch and layers and one pumkin 3 1/2 inch and layers.
Doodlecharms for (Spider) cut one spider 3 1/2 inch and hit shift and cut one spiders. I used a silver glitter gel pen and pen stitch around the letter and picture area. My pen stitching is all over the place "lol". I added black and silver spider web ribbon and added black seed beads for spiders eyes and nose
Here is the download cut file! Enjoy
Cricut projects, Cardmaking, Crochet, Jewelry and More! Everything handmade will be posted here!
Pages
▼
Thursday, October 29, 2009
Wednesday, October 28, 2009
Once Upon A Time Scrapbook Layout!!
Click photo to enlarge
Hi everyone, Here is a framed scrapbook layout my sister made for me. This is a beautiful scrapbook layout of my Family. The top picture is me (Judy) holding my daughter she was ten months old here, my husband and my son. The other picture is my daughter when she was two years old. The little boy is a old picture of my bother Earl when he was five he is fifty years old now. The other picture is my sister Beverly, my sister Maglene, my bother Earl not in the picture, my sister Brenda, Thats me (Judy) in the red, My brother Joseph and my brother Ricky, we are in order from oldest to youngest. The front row is my Dad and Mom. Beverly used The Once Upon a Time Stack by DCWV.
Sunday, October 25, 2009
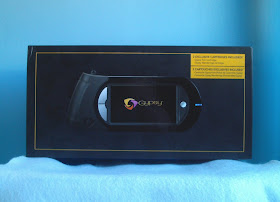
I Got My Gypsy!!
Friday, October 23, 2009
Merry Christmas Card!!
Click photo to enlarge
Hi all, Here is a card for Delightful Sketches Challenge, I used the Freebie Friday Image from Digital Delights by Louby Loo. This image is so cute I like all of Wendy's images. Card size is 4 1/4 by 5 1/2. I used my colored pencils and glitter gel pens to color the moose image.
Cartridge I used :
Potpourri Basket for ( Snow flake) cut.
Plantin SchoolBook for (oval) cut.
Have a good weekend all!
Thursday, October 22, 2009
Halloween Trick or Treat Card!!
Click photo to enlarge
Hi all, Here is two cards I made for Creative Inspirations Challenge #32 Halloween. I used the Freebie Friday Image from Digital Delights by Louby Loo. If you want this image, today is the last day to get it free. Go and visit Digital Delight by Louby Loo today and see all her images! My card size is 4 1/4 by 5 1/2 inch.
Cartridge I used:
Wild Card for (Icon) on page 33 That is the green and orange cut on front of card.
Tuesday, October 20, 2009
A Handmade Gift Box !
Hi all, Here is a box I made! This handmade gift box can be used for handmade A2 cards and evelopes or small writing tablets and pencils. This can be a gift for co workers etc. The box I made measure 1 1/2 depth by 4 1/2 width by 4 1/2 height. I used cereal box chipboard and I used grip - tac self adhesive decorating covering to cover the chipboard. I got the grip-tac at the dollar store 18 x 40 inch for $1.00. I like this grip -tac it makes it waterproof. Have a good day all!
Sunday, October 18, 2009
Tag Box ...With Cut file!
Here is a box I made for the Halloween Party. I made this tag box with Cricut DesignStudio. This box was made with a tag and square from Plantin SchoolBook Cartridge. These tag boxes can be used for any occasion holiday,birthday etc. Box size is 3 1/8 in Wide by 4 in Height. I hope you all like them. If you make one leave a comment and let me know what you think. If you download my cut file leave a comment! I work hard on creating them free for you.
Cartridge I used:
Plantin Schoolbook for ( Tag Box) Designed in Cricut DesignStudio. Use 12 X 12 mat and heavy cardstock or chipboard to cut out tag box.
Paper Doll Dressup (monster,cat,ghost) cut at 4 1/4 and (spider) cut at 3 1/4 inch.
Have a good day all!
Here is Download cut file.
Monday, October 12, 2009
Happy Thanksgiving Stair Step Card!
Click photo it will enlarge
Hi everyone,
Here is a Stair Step Card I made for Thanksgiving. This is my first Stair Step Card! This card is really fun to make. These cards may be done in landscape or portrait. Pick a theme and let your imagination run wild. I cut cardstock for the top of my card at 5 by 6 inch for the last step on my card and glue it to the card. I used cuttlebug embosser ( Swiss Dots) folder.
Scoring and folding Instructions:
1) Cut your cardstock to the size of 5 1/2 x 10 1/2 inch
2) Score your cardstock at 1 1/4 - 2 1/2 - 4 1/4, 6 and at 8 1/4 inch. Now fold .. making sure that the smallest(1 1/4 inch fold) is folded down.. this will be the front of your card. Look at my card, you can see how my card is folded down.
3) Choose a theme and decorate with die cut, stickers etc
Let me know if you like my card. Have a good day everyone!
Thursday, October 8, 2009
Happy Birthday Card!
Click photo it will enlarge
Hi all,
This Birthday Card was designed for Mojo Monday Madness Sketch #107 contest. Card size is 4 1/4 by 5 1/2. The happy birthday stamp is from the Dollar Tree Store.
Cartridge I used:
Mini Monograms for (scallop and circle)
Hi all,
This Birthday Card was designed for Mojo Monday Madness Sketch #107 contest. Card size is 4 1/4 by 5 1/2. The happy birthday stamp is from the Dollar Tree Store.
Cartridge I used:
Mini Monograms for (scallop and circle)
Wednesday, October 7, 2009
A Squirrel Shape Card!
Click on photo it will enlarge
Hi all,
The CuttleBug Challenges Be Inspired # 52 is to create a Halloween or Fall Card. Here is my card. This is a squirrel shape card I made. I welded this card in DesignStudio at 5 1/2 inch. I welded the base and blackout together and then I cut the layer for the card. I embossed the squirrel with Swiss Dots.
Cartridge I used:
Winter Woodland for (squirrel and nut)
Plantin SchoolBook for (envelope)
Have a good day all!
Monday, October 5, 2009
Breast Cancer Awareness Card! May God Be With You!
Click on photo it will enlarge!
Hi everyone,
This is for The Cuttlebug Spot challenge # 51: Pretty in Pink in Honor of Breast Cancer Awareness month. My card size is 4 1/4 by 5 1/2 inch. To make ribbon I used a small strip of pink foam sheet and added a pink brad. I embossed the card with D'vine Swirls folder and foam ribbon was embossed with Swiss Dots folder. Have a good day all!