Hello to all my blog friends and followers. I appreciate each and everyone of you. I want to thank all my regular friends and followers who comments on my blog all the time. Your comments is what keeps me sharing all my creations;) Today! I'm sharing a project that is every where on the web. These little tissue travel pouches are made in all kinds of fabric and felt. These can be made to give to anyone who need to keep their nose clean. LOL :)
These tissue pouches are so easy to make. I made one and it was so cute I made another! The felt and tissue packs I put inside of felt pouch is from Walmart. The cute felt owls is from Michael's Craft store.
Here is a close up of the pretty purple one. My daughter already claimed this purple one:) I hope you all like my creations for today. I been sewing a lot of quick and easy projects lately. Leave a comment and let me know what you think.
Thank you for stopping by:)
Cricut projects, Cardmaking, Crochet, Jewelry and More! Everything handmade will be posted here!
Thursday, September 27, 2012
Tuesday, September 25, 2012
Initialed Chapstick Holder Project!
Hello all. Hope you all are having a great week. I seen this felt chapstick holder tutorial on this site and I had to make some. Here is the link if you want to try to make some of these too:) These are so super easy to make!
Here is a photo of the inside. Have a great week all. Thank you for stopping by:)
Thursday, September 20, 2012
Flameless Scented Candle Project!
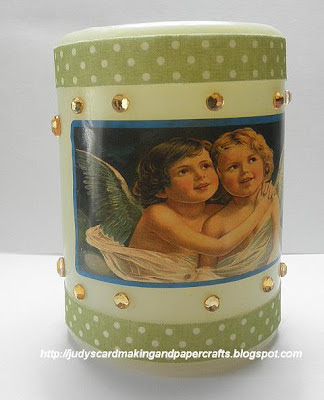
Happy Thursday! I hope everyone is having a great week. Here is Battery operated scented candle project I embellished. The candle has a vanilla scent to it. I used Making Memories Vintage hip textured adhesive fabric tape, rhinestones and Victorian Collection sticker on this candle.
Here is a card I made. I will be giving this card and the candle to my sister. I used Martha Stewart butterfly punch and Martha Stewart Flower bed edge punch on the card.
Here is a video of the candle lite up in the dark. The Victorian sticker looks like it is glowing in the dark:) I will be giving away one sheet of these Victorian Collection stickers to the first USA adressee person to comment on this post. If you are the first to comment email me your snail mail and I will send them to you:) Thank you for stopping by;)
Friday, September 14, 2012
Light Up Birthday Gift Box Idea !
Happy Friday! I hope everyone is having a great day. My friend is having a birthday tomorrow and I wanted a unique box to put her present in. I wanted this box to look like it has a candle flame lite on the top of it. So I used a battery operated tealight on the box top:) I like the battery operated tealights because they can be turned on and off. I purchased the birthday box and battery operated tealight from the Dollar Tree store. I chose this box because it already has a candle flames printed on the box.I put a Walmart gift card and eight different colors of nail polish in the box:) She loves to paint her nails:)
Here is a photo of the battery operated tealight. I took a photo of the tealight because some people may not know what they are. I hope you like my light up Birthday gift box idea!
I made a small hole in top of box lid. I hot glued the battery operated tealight into the hole. Here is how it looks on the inside of box top.
Have a great weekend everyone! Thank you for stopping by;)
Wednesday, September 12, 2012
More Scarecrows in a Pumpkin Box!
Here is a few more of the different scarecrows I put in the pumpkin boxes. You can see the first one I made here if you missed this post. The two shown here was made for my daughter to give to her teachers at the school. This scarecrow and pumpkin box decoration is so cute! You know me I had to make some more to give as gifts :)
This scarecrow has angel wings on the back of the dress. The scarecrows and leaves was purchased from Walmart. The pumpkin box is from Cricut Tags, Bags, Boxes & More 2 Cartridge.
Have a great day! Thank you for stopping by:)
This scarecrow has angel wings on the back of the dress. The scarecrows and leaves was purchased from Walmart. The pumpkin box is from Cricut Tags, Bags, Boxes & More 2 Cartridge.
Have a great day! Thank you for stopping by:)
Friday, September 7, 2012
A 3D Accordion fold paper Fan!
Happy Friday. I hope you are having a great day. Here is a Cricutless project! My daughter is having a pizza party get together with some girl friends tomorrow. She wanted to make something to give to them. We made them a 3D accordion paper fan. These turned out really pretty. We made them all in my daughter favorite color pink. I made some candy bags but I forgot to take a photo of them:(
Here is how we made these. We took a 8 1/2 X 11 inch piece of cardstock. I used Martha Stewart Flower bed edge punch and punched down the 11 inch side of cardstock. Then we used a scoring board and scored every 1/2 inch down the 11 inch side. Next we accordion folded all the 1/2 inch markings. We took piece of tulle and tied around bottom of fan. I hot glued a butterfly gem to the prima flower and hot glued it on tulle. That all we did. They are so pretty and very easy to make. Here is a close of tulle and flower.
Here a close up of how pretty the punched edge looks! This is my favorite Martha Stewart edge punch!
Have a great weekend all. Thank you for stopping by:)
Wednesday, September 5, 2012
Autumn Decoration idea!
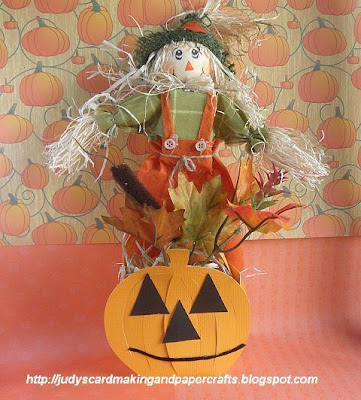
Happy Wednesday! I hope you all are having a great day. Here is a cute Autumn decorations I put together. This is a cute decoration for a table! The cute scare crow is from walmart and the Autumn leaves is from Dollar Tree Store. The scare crow cost $1.00 and Autumn leaves cost 50 cents.
This pumpkin box is from Cricut Tags, Bags, boxes & More 2 Cartridge. I used a 12 x 12 inch piece of texture cardstock and used the fit to page button on cricut to cut out pumpkin box. This is a cute box to use for Autumn or Halloween;) I love this cart!
Here's a side view of the box.
Here is a close up shot of the cute scare crow.
I'm linking this Autumn Decoration here. Decorate to Celebrate Challenge #33: Autumn Spledor. Have a great week all. Thank you for stopping by:)
Monday, September 3, 2012
Butterflies and Rosette Card;)
Happy Monday! I hope everyone here in the USA is enjoying the Labor Day Holiday. Here is a card I made.
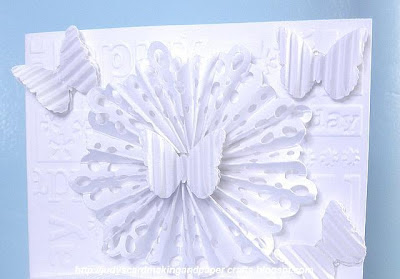
The butterflies is from a Martha Stewart classic butterfly punch. All the butterflies was punched out on white corrugated paper:) To make rosette I cut a piece of cardstock to 1 1/2 inch by 11 inch. I punched down the 11 inch side with the Martha Stewart Flower Bed punch. Used a score board and scored every 1/4 inch. CLICK HERE to see a tutorial I made on how to make a regular rosette.
I embossed the card with CuttleBug Happy Birthday embossing folder folder. I used black crafting chalk to give the Happy Birthday some color. Made a tied tulle bow with gem and adhered it to card.
Have a great day everyone. Thank you for stopping by and looking;)
Subscribe to:
Posts (Atom)


